Fitting The Mixer shower valve in a Coram
shower pod
|
|
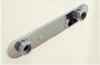
Bar mixer valve - unique easy-fit system
A special mounting plate is factory fitted to
the pod wall, which means that on site you simply need to connect the
mixer to the hot and cold feeds with the valve nuts. On the reverse of
the mounting plate flexible pipes hang down the back of the unit and
these can be accessed via the removable panel at the front of the base
to allow easy attachment to the piped supplies with the push-fit
connectors provided. The rest of the shower fittings are then simply
screw fixed. |
|
 |
A unique mounting plate is factory
fitted to the pod wall
|
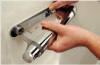
Coram shower pods have built-in
shower valve
The
built-in valve is factory fitted, which means that on site you simply
need to connect the mixer to the hot and cold feeds on the reverse of
the valve and connect the showerhose via the bulkhead. The rest of the
shower
fittings are then simply screw fixed.
|
|
|
A unique mounting plate is factory
fitted to the pod wall
The mixer simply connects to the hot and
cold feeds with valve nuts
|
 |
|
Anti-ligature sprayhead
For
special commercial application an anti-ligature fixed sprayhead is also
available.
|
 |
Flexible pipes hang down the back of the
unit |
|
|
The pipes are accessed via the removable
panel at the front of the base, allowing easy attachment to the piped
supplies with push fit connectors provided |
 |
|
|
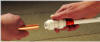 |
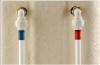
Push connectors. Simply push
the tail of your 15mm copper pipe into the fitting. Job
done! |
|
| |
Fitting The Shower Pod
|
|
The walls and base of the shower pod are
supplied in two sturdy cartons, which can easily be manoeuvred on site
up stairwells and through doorways to the exact location. The pod is
robustly constructed from GRP (glass reinforced polymer) and can be
fitted by one man in the simple stages shown below. |
|
 |
 |
|
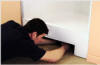
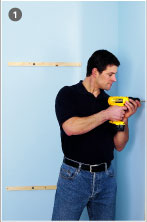
STEP 1:
Position and fit the fixing batons
to the wall |
STEP 2:
Locate, level and fit the base |
| |
|
 |
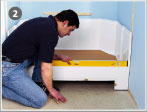
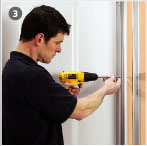
STEP 3:
Slot the side panels to the base
and fix to the back wall batons, using the spacer provided to
ensure that the correct gap is left for the back panel |
| |
|
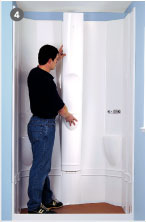 |
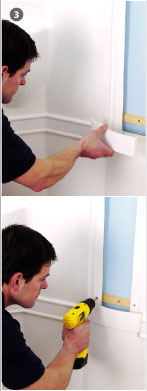
STEP 4:
The back panel can then be slotted
into position and secured with a single screw |
 |
STEP 5:
The front edges of the side panels
can then be secured to the side wall batons and the fixing
screws will be concealed by the door frame |
| |
|
|
| |
Fitting the doors on a Coram shower pod
|
|
Coram’s
shower doors have been designed to be faster and easier to fit than any
other on the market, which is why Coram have become a leading provider
of shower enclosures to trade installers. Each shower door is supplied
fully assembled, so that on site all that is required is to fit the
handle and then install it using the wall channels as shown below.
|
|
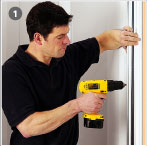 |
STEP 1:
When fitting the shower door the
first thing is to position the wall channels and drill the screw
holes. |
|
|
|
|
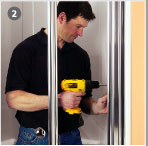 |
STEP 2:
The door is finally secured by
drilling through the wall channels into the door frame and
fixing with screws. |
|
|
|
|
 |
STEP 3:
The wall channels are then slotted
onto the door and screw fixed to the wall. |
|
|
|
|